Growing Asparagus Takes Patience


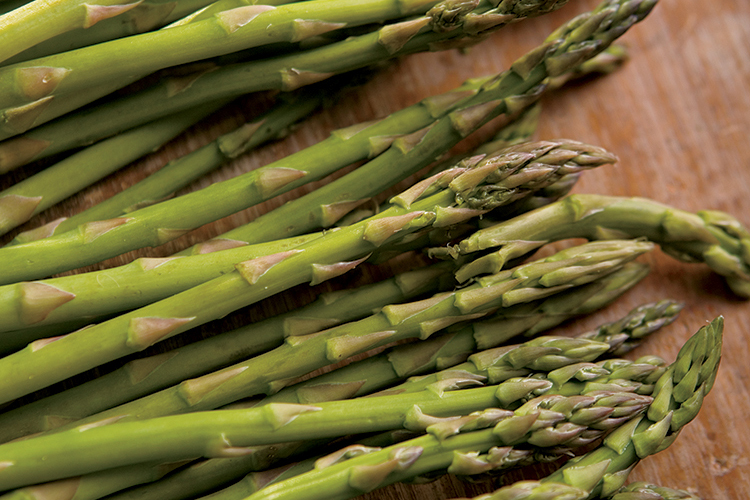
If you’re starting asparagus in your garden this year, remember that you’ll have to wait three years after planting for your first crop.
But that patience pays off, because once planted, an asparagus plant can keep producing for another 20 or 30 years. It’s definitely the veggie that keeps on giving.
Bed Prep for Growing Asparagus
Bed preparation can be done in the fall before the ground freezes, or you can wait until spring.
Choose a spot in full sun and where a 5-foot-tall hedge won’t be a problem. Don’t opt for your regular vegetable garden because yearly cultivation will disrupt the asparagus, a perennial. Remove any grass, weeds and rocks, then incorporate a lot of compost or other organic matter, which asparagus loves.
SEE ALSO: Recipes With Asparagus
Using a mechanical tiller or by hand, till a trench 12 to 18 inches wide and a full 6 inches deep. Now you are all set for planting.
Planting Your Asparagus Garden
I prefer to order asparagus crowns from a catalog because you never know how long they’ve been sitting around drying out in discount stores. Order one-year crowns that have compact centers surrounded by dangling roots. Picture an octopus to get an idea of what they look like.
When the ground can be worked in the spring, add a balanced fertilizer such as 10-10-10. Place the crowns at the bottom of the trench, spaced 9 to 12 inches apart, splaying out the roots. Cover with about 2 inches of soil. Over the remainder of the summer, gradually fill in the trench as the asparagus grows.
SEE ALSO: When to Plant Springtime Vegetables
Now comes the hard part – patience. You can’t cut any spears this first year or for the following two years. Well, maybe you can cheat a little on year three if the bed establishes nicely. Let the plants grow up into ferny hedges collecting as much energy as possible from the sun. Cut down the hedge after a hard freeze in fall or wait until late winter, if you prefer. Each spring the asparagus grows back more plentiful and with thicker spears.
How to Harvest
Harvest by snapping off the spears at ground level or cutting with a knife slightly below the soil surface. Watch out for emerging tips of other spears. Harvest spears pencil width or larger and switch to fertilizing after harvest instead of early spring.
Weeding can be a challenge. The first asparagus emerges at the same time as the first weeds. Be careful of the unseen tips that have yet to grow. Reaching into the hedge in summer to weed risks death by tickling.
Asparagus beds last for 30 years, so are well worth the wait.
Other fun facts about asparagus:
- Asparagus is one of the first vegetables ready to harvest in the spring.
- Native to the Mediterranean, asparagus was eaten by the ancient Greeks.
- Nutritionally, it’s high in fiber and contains bone-strengthening vitamin K and antioxidants. Read More
Find more about how to grow asparagus at by clicking here.
4 Comments
Join the discussion and tell us your opinion.
I just made this custard, it turned out pretty good but I forgot the vanilla and I baked it in a 1 1/2 qt baking dish had to bake it for almost an hour and a half. But it was still pretty good. Put it outside to cool for and hour and it set up beautifully
I made this custard using ramekins/custard cups and baked it for 45 minutes. I made it again today and used an 8 x 8 pyrex container and it took longer ie an hour and fifteen minutes. This is the easiest dessert and tastes yummy.
I made this today and it was a disaster. It ended up runny and separated. Never did set up. Baked for 45 min in 1 1/2 oval dish. What happened?
Why is there liquid at the bottom when they are cooked
It wasn’t cooked long enough if it was runny and not set. Cooking it in an oval dish as opposed to individual ramekins makes a big difference in the baking time. You needed to keep baking it until a knife inserted into comes out clean.
Great dessert! I was worried when I read 4 cups of milk to only 4 eggs so I added another egg (5 total). It came out beautifully (and probably would have also if I had used the 4 eggs called for). I thought it was delicious. It reminded me of the custard my aunt made when she would visit. Great comfort food and my 11 month old ate almost a whole ramekin which is saying something because he sort of skipped baby food and went from bottle to “give me solids Mama!” The only other things he has really enjoyed with this consistency have been sweet potatoes. So we have a hit!
For ramekins, baking for 1 hour worked best for me.
Made this custard today came out very good it’s important that you mix the milk with the eggs slowly delicious
This is one of my all time favorite deserts! I ” tweak” yhis just a little ….
I put just enough Maple Syrup on the bottom of the ramekins to coat the bottom then add the custard mixture before baking.
Also: I use
The Spice House ‘French Four and More’ , instead of nutmeg on top.
The maple syrup is a great idea – thanks for sharing!
Will this work using low fat milk or does it need to be whole milk?
Great question. Due to the water content in low-fat milk, I’d recommend using whole milk for this recipe. You might be able to do a low-fat version by adjusting the temp and baking time. Hope this helps!
I am just getting around to commenting on this having made it a short time ago. I used ramekins and it came out perfect and very tasty. I added some heavy cream to the skim milk we drink. I also made it in a baking dish and it took much longer and had to keep cheking on, but ithe was still good.
Lana~ I’ve made this for many years using skim milk. I add two or three additional eggs and it turns out perfect. Try it a couple of times to adjust to the texture you like best. I like best when refrigerated overnight. I have never heated the milk. I beat eggs with nutmeg, add a cup or two of milk and sugar and beat then add remaining milk and final beat. I learned how to make it over fifty years ago when I worked in a hospital kitchen. Also have trouble with baking time when changing ovens but you can’t go wrong if you test with a knife inserted in center that comes out clean. Always one of my favorite recipes.