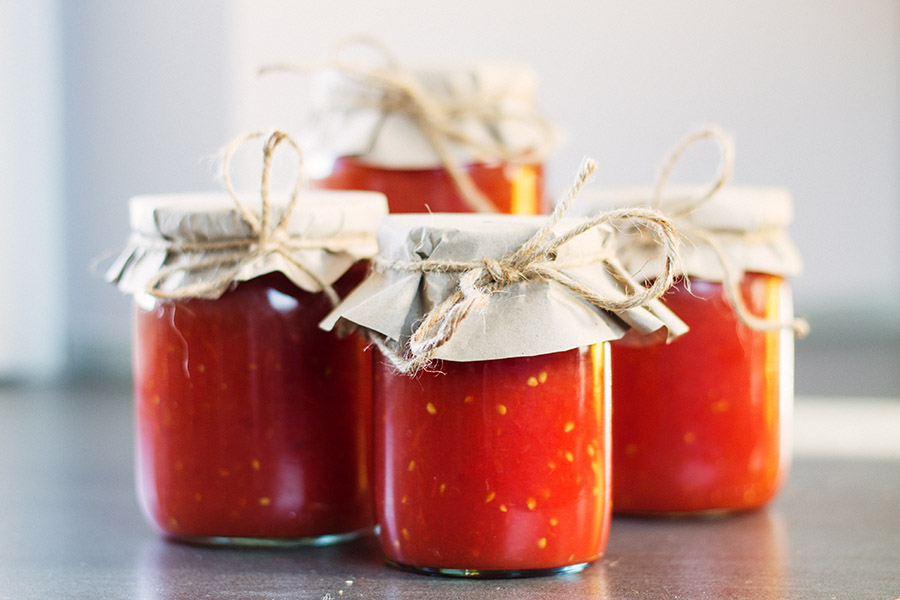
How to Can Tomatoes Using the Water Bath Method


Last year I began my quest for expert canning processes. Not that there was a lack of expertise, it’s just the experts were fewer and farther between.
The county fair reined. Two names were synonymous with canning: a mother-and-son team, whose canned tomato sauce, salsa, relish and ketchup were racking up accolades at county fairs.
Junette Young and her son, Tracy, appreciated the beauty of a preserved tomato in all its incarnations. For them, a righteously canned tomato in winter promised a taste of summer in stew, chili and spaghetti.
See more: 25 Seasonal Recipes to Make With Fresh Tomatoes This Summer
They confided that the secret to canning was not in the technique. The winning ticket was labeled with a straightforward directive for anyone with a water bath canner. Grow your own favorite varieties, and then pick a few to preserve. For best flavor, process only a few jars at a time. (Note: The number of tomatoes is not specified, as it varies depending upon the size of the water bath canner.)
What You’ll Need for Canning Tomatoes
- a boiling water bath canner
- 2 large saucepans
- quart jars, lids and sealing surfaces (flats and rims)
- fresh tomatoes
- bottled lemon juice
- canning salt
See more: How to Grow and Care for Tomato Plants
Water Bath Method Instructions
- Fill a large saucepan two-thirds full of hot water to boil.
- Fill boiling water bath canner half-full of hot water. Put canner on to heat.
- Examine jars and sealing surfaces to make sure that all surfaces are smooth. Wash jars and sealers (rims) in hot, soapy water. Rinse well. Leave jars in hot water until needed.
- Put lids (flats) in saucepan filled with water, and place on stove to simmer until needed.
- Select just enough tomatoes for one canner load. Make sure tomatoes are fresh, firm and red ripe. Wash tomatoes and drain. Put in wire basket, and lower into boiling water in the second large saucepan. Remove after about 60 to 90 seconds, or when skin begins to crack. This depends upon the size of tomatoes – smaller varieties may only take 30 seconds.
- Dip tomatoes into cold water. Cut out cores and remove skins. You can leave the tomatoes whole or cut them in half. Place in a large pot; add enough water to cover tomatoes. Boil gently for 5 minutes.
- Remove 1 jar from hot water and drain.
- Add 2 tablespoons of bottled lemon juice to each quart jar. If using pint jars, use 1 tablespoon lemon juice.
- Pack hot tomatoes into jar, leaving ½-inch headspace. Pour hot cooking liquid over tomatoes, leaving ½-inch headspace. Add 1 teaspoon canning salt to each quart jar (½ teaspoon for pint jars).
- Run a nonmetallic spatula between tomatoes and jar to release any trapped air bubbles. Wipe top and threads (the screw threads at the rim) of the jar with clean, damp cloth.
- Using tongs, remove 1 lid from simmering water and place it flat on top of jar so sealing compound is against jar. Screw band down evenly and firmly.
- Repeat steps 10 and 11 with all jars. As each jar is filled, stand it on rack in canner of hot, not boiling, water, which should cover jars by 1 to 2 inches. (Add additional water if necessary.) Put cover on canner, and bring water to a boil.
- Process quarts for up to 45 minutes (40 minutes for pints) at a gentle but steady boil.
- Using tongs, carefully remove jars from canner and set on a wood or cloth surface, placing jars several inches apart and out of drafts. Do not retighten bands. Allow jars to cool about 12 hours.
- Remove bands (rims) and test seal. Wash outside jar surface. Store in a dry, dark and cool place.
This recipe has been adapted from the Ball Complete Book of Home Preserving. For more detailed instructions, please refer to the book or website, freshpreserving.com.
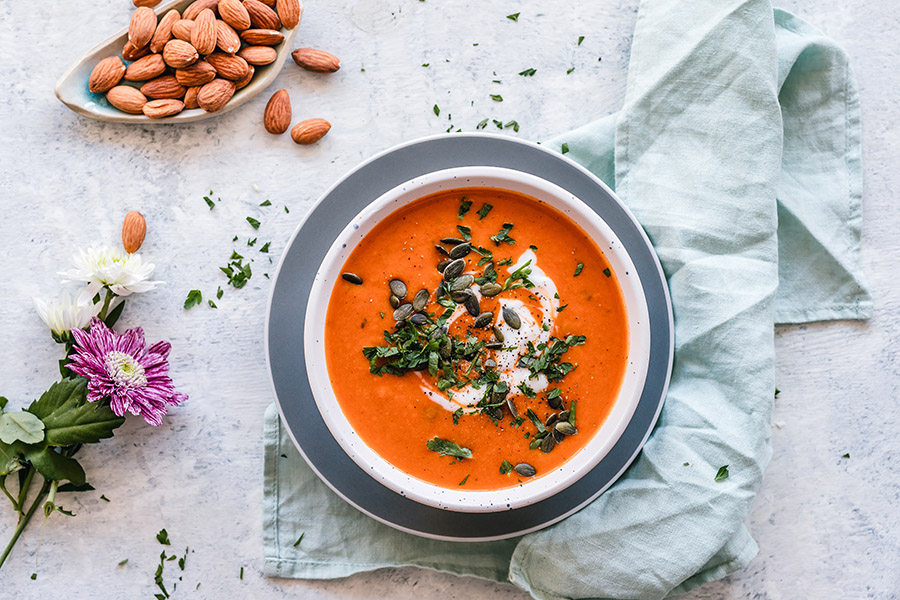
Recipes Using Canned Tomatoes
Creamy Tomato Basil Soup
Tamale Pie
Eggplant, Mozzarella and Pesto Gratins
Spicy Sirloin Beef Stew
About Our Guest Author: Roben Mounger has a penchant for searching out locally produced ingredients for her family’s meals. For some 15 years, she has eaten year round by way of CSAs and farmers markets. Roben writes a weekly column about food for The Columbia Daily Herald and blogs about eating locally at Ms. Cook’s Table.
32 Comments
Join the discussion and tell us your opinion.
You shouldn’t save and plant seeds from regular store-bought pumpkins. The reason why is because most of these pumpkins are hybrids which means they are a specific blend of two varieties or cultivars. The seeds in these pumpkins won’t necessarily produce pumpkins or plants with the same properties or characteristics as the original plant. This is because instead of being crossed by two specific varieties, they were “open pollinated” out in the field. Saving seeds from heirloom pumpkins is the way to go since these have bred in the open for centuries and you can be pretty well assured that the properties of each seed will be similar to the original pumpkin. This idea of saving seeds from heirlooms rather than hybrids is true for all crops.
Hi Jason,
We’ve updated the post with this important detail – sorry we weren’t clear in the first place. Thanks!
Jessy Yancey
editor
Farm Flavor
Great! Glad to help!
I’ve had two fine looking pumpkins grow on accident from store bought pumpkins.
In my experience, seeds from store bought pumpkins grow perfectly fine. This year I have nine pumpkins and counting coming from last year’s store bought fruit; many are smaller than your average Halloween pumpkin, but they’re still definitely pumpkins. If you’re really picky you should be careful about what you plant seeds from, but I think most casual gardeners would be perfectly content with the results of seeds from store-bought pumpkins.
The problem with that is Monsanto and GMO. This is not same thing as hybrid . Find organic pumpkins and buy them.
I planted some heirloom seeds I bought and they never grew. About 10% actually broke through the ground but never grew much beyond that. Any ideas as to why this happened.
I was hoping you could help me out.
My pumpkin plants are turning yellow and dying.
They are not close to being rip yet.
Do you know what this is and what I can do to fix this?
I have never seen this before.
regards
Robert
I have the same problem as robert
You cannot touch vines with bare hands. Use gloves when handling.
How much water are you giving them? Sometimes you can over water
Thanks for the help but where do I store the envelope with the pumpkin seeds? Is one place better than another?
I am having dried pumpkins. Kindly am requesting for market. For contact: 0701084074 / 0782084074
Will the GOOD seed float or sink in a water bath?
I have tried to grow my own pumpkins for the last 2 years without luck. I have wonderful vines, leaves, and many Male budding flowers. The female flowers from what I’ve seen and read are not blooming at all! What’s going on??
Also our squash and zuchinne plants did the same thing the last 2 years as well. Really nice plants and flowers without produce!
Try pinching the tip of each vine and pumpkin will start pushing out. That for the others too.
How many bees are there?
Have you ever planted a pumpkin seed without drying it. I have some pumpkins that have survived the winter. Thought of just taking the seeds straight from the pumpkin and planting them. Will this work?
Last year I buried three jack o lanterns with another one that we didn’t cut up, and got in trouble with the wife because they took over a 20′ x 20′ section of the back yard. Harvested about a dozen “cupid-o-lanterns” for valentine’s day
for some reason my seeds will not grow anything even a bud, please tell me why
When should you plant your pumpkins seeds to have pumpkins for Halloween in Southeastern PA?
Much easier – just take the seeds, no need to wash very well – place them in a sealed plastic bag and put right into your freezer. In the spring, you can thaw and plant them with nothing else required.
I have thrown out pumpkins in my garden area, left them to rot, and had pumpkins the following year and the next. That is, until the weeds took over 😉 But I will say these are farm-grown pumpkins, probably heirlooms not sure.
I usually bake pumpkins whole then when they are soft, I scoop out the seeds. Do you think that baking them and trying to use the seeds for next year causes some of the seeds to not germinate because of the heat in the oven?
Cooked seeds can’t germinate. The heat kills them.
Can you can a 1/2 jar of diced tomatoes?
[…] Put cover on canner, and bring water to a boil. Process quarts for up to 45 minutes (40 minutes for pints) at a gentle but steady boil. Using tongs, carefully remove jars from canner and set on a wood or cloth surface, placing jars several inches apart and out of drafts. via […]
[…] Put cover on canner, and bring water to a boil. Process quarts for up to 45 minutes (40 minutes for pints) at a gentle but steady boil. Using tongs, carefully remove jars from canner and set on a wood or cloth surface, placing jars several inches apart and out of drafts. Do not retighten bands. via […]
[…] Put cover on canner, and bring water to a boil. Process quarts for up to 45 minutes (40 minutes for pints) at a gentle but steady boil. Using tongs, carefully remove jars from canner and set on a wood or cloth surface, placing jars several inches apart and out of drafts. via […]
[…] How to can tomatoes using a water bath canner […]
[…] Source: 🔗 […]
[…] Source: 🔗 […]